My first Domoticz plugin
Sunday 27 September 2020
Domoticz
A few weeks back I released the Domoticz SolarEdge_ModbusTCP plugin and in the previous post I promised to share my experience of creating that plugin.
Before we dive in, let me share my starting points: I had never written a plugin for Domoticz and I had never used (either to run or develop something in) Python. I have developed software using object-oriented languages like C++, C# and Java.
Let’s do some homework first
I hate to spend time on something when somebody already did so and a solution exists that can be used out of the box. It was interesting to see how many posts I could find on the Internet of people trying to do the same thing I was looking for. And there were already lots of options available. Most of the solutions were based on the idea of running a script every so often to collect the values from the inverter and then push them into Domoticz (in all sorts of ways). I found Perl scripts, bash scripts and a Python script.
The Python script looked promising. Although it was in its early stages of development, it did exactly what I was looking for. However, when I started to have a better look, I found some serious issues. The main one: the script communicates with Domoticz using the Domoticz API/JSON URL’s and would only do so using http with no security at all. That was a showstopper for me. It’s an absolute “no no” nowadays to upload data to a server/service using unencrypted traffic and no authentication whatsoever.
Now, I can imagine that this could be fixed, but then I thought: why would you? I noticed that Domoticz supports plugins written in Python.
When looking at the Python script, I noticed it was using a library to do the actual communication with the inverter. Since the script worked, I now knew that it should be possible to create a Domoticz plugin.
Create the plugin
The Domoticz wiki has a nice page named “Developing a Python plugin”. Sounds like the right place to start.
But hold on. Although I have looked at quite some Python code in the past and I can “read it”, I never actually written anything in Python. My target is to get this Domoticz plugin working, not to fight the Python runtime. Time for “hello world”; I spend some time to look at the basics of Python.
Then it was time to have a look at the templates as mentioned on the Domoticz wiki page. Very helpful and in no time, I had my basic structure setup. I knew how to get a plugin setup and installed and to “see it” in the Domoticz hardware page.
I used the example provided by the solaredge_modbus library to understand how to connect to the inverter and get the values from it. Got that working in no time at all.
But then the fun started, and this is where I spend most of my time: Domoticz devices. The SolarEdge inverter provides a whole stack of values:
- Status
- Vendor Status
- Current
- P1 Current
- P2 Current
- P3 Current
- P1 Voltage
- P2 Voltage
- P3 Voltage
- P1-N Voltage
- P2-N Voltage
- P3-N Voltage
- Power
- Frequency
- Power (Apparent)
- Power (Reactive)
- Power Factor
- Total Energy
- DC Current
- DC Voltage
- DC Power
- Temperature
And each comes with its own unit or symbol of course.
Domoticz Devices
We will need to create a device for each one of them in Domoticz. Some basic information is required to create a device. Items like a name and a unique id (Unit). No problem there. But then there is a stack of optional parameters that can (and as I found out need to be) supplied:
- Type
- Subtype
- Switchtype
- Options
Ok; no worries; let’s do so. The
“Developing a Python plugin”
has a table of “Available Device Types”.
The list has options for voltage, ampere, percentage and text.
That was enough to get me started with the basic values and was a nice way to find out how to create devices
and see the results in Domoticz.
Worked perfectly. Great, this is going to be a walk in the park!
Temperature
Next step: let’s add temperature; there’s a known device for that.
But hold on, why does it say LaCrosse TX3?
That’s a weather station; not the temperature sensor of my inverter.
I could find other devices in the list for temperature, but most of them were related to weather stations.
The page states that the list is not complete, so there must be other devices that are supported but not yet documented. It took me some time to find that there are multiple lists in the source code of Domoticz. One of them looks interesting in this context: hardwaretypes.h.
That file lists a type named pTypeGeneral with a whole set of subtypes.
There are subtypes named sTypeSystemTemp and sTypeTemperature.
I tried both and the plugin could create the devices and upload data to Domoticz.
However, I could not get Domoticz to produce a graph for the sTypeTemperature device.
No matter what I tried, I could not get the sTypeTemperature to work.
For now, we will have to use sTypeSystemTemp and
perhaps I will find out at some point how to get the sTypeTemperature device going.
Frequency
Now, what to do for something that doesn’t exist at all?
For example, I could not find anything that would handle frequency.
The solution seems to be to use the subtype sTypeCustom.
Nice, but how does that work?
When creating a custom type, it is required to also provide the options parameter.
And the documentation says: Options: {'Custom': '1;<axisUnits>'}.
By looking at some other plugins, I found out that it should read: "Custom": "1;Hz" for my scenario.
And here we go; we now have a device that can be used for frequency.
I have an open action point for the custom device: icon. Currently, the custom device shows a default icon. It is possible to add a custom icon to the device, but I have not yet investigated that.
Total Energy
The unit of the total energy value as reported by the inverter is Wh.
I found the sTypeKwh subtype and the documentation reports Electric (Instant+Counter).
Initially I had no clue what this meant, but after some experimenting, I found out that I had to supply 2 values.
The first one would be the most recent level and the second one the total energy.
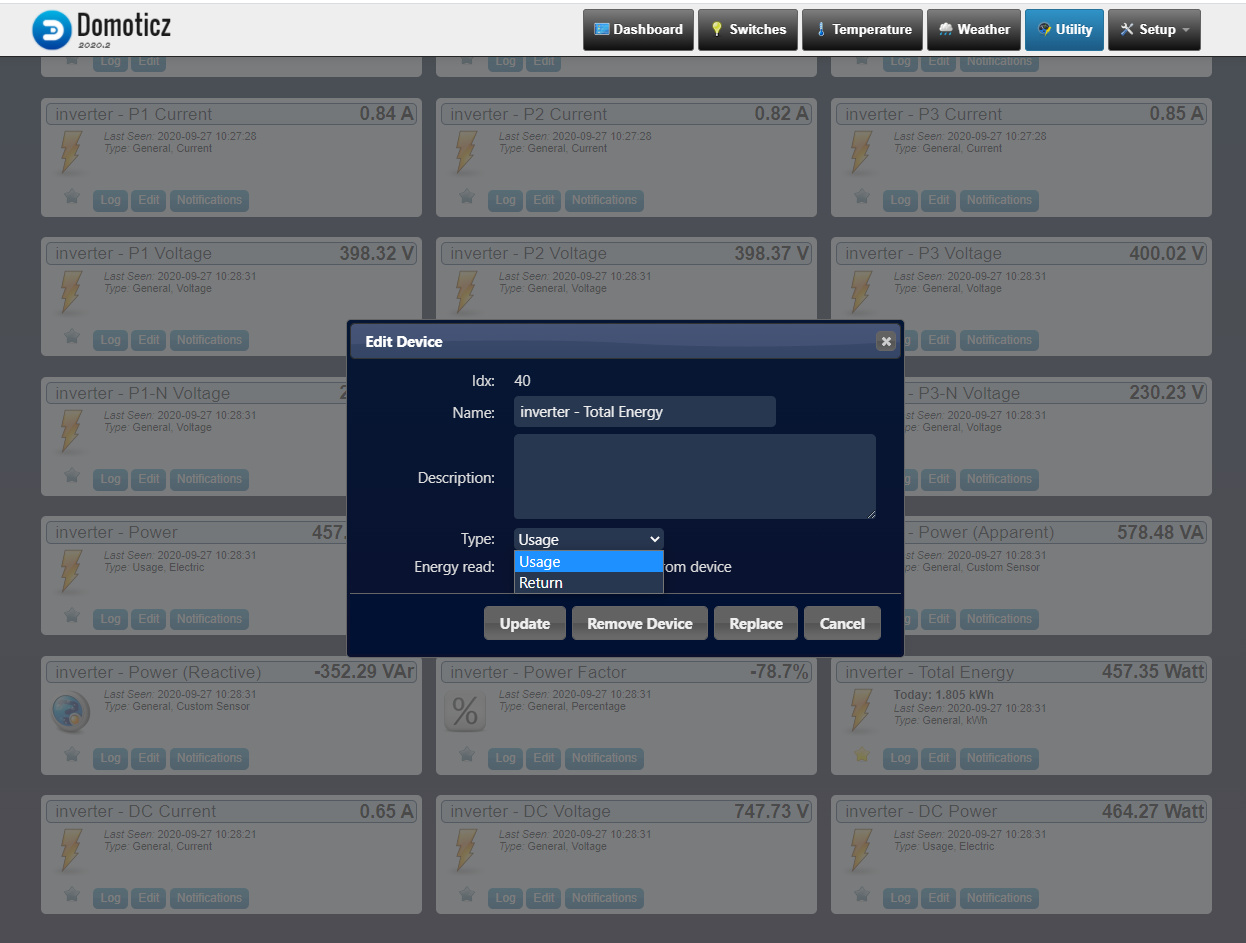
When looking at the graph showed by Domoticz, I noticed something strange.
The labels showed Energy Usage and Power Usage.
Makes sense, right?
How would Domoticz know if this is a solar system that is not using, but producing power?
I noticed that I could edit the device in Domoticz and it allowed me to select a Type: Usage or Return.
Apparently, that is an option of this device.
Initially I could not find any documentation how to select this option during the creation of the device.
But then I noticed that other plugins, working with energy, did not use the sTypeKwh but sTypeManagedCounter.
The plugin develop page has additional information for that type.
The device, has another attribute: Switchtype which can have one of these values:
| ID | Name |
|---|---|
| 0 | Energy |
| 1 | Gas |
| 2 | Water |
| 3 | Counter |
| 4 | Energy Generated |
| 5 | Time |
Hey, that looks good: Energy Generated.
Dropped the device and recreated it with that Switchtype.
Works perfectly.
We now know that this is also applicable for the sTypeKwh type.
Installing the plugin
By now I had a working plugin; time to share it with the rest of world. I noticed that most of the other Python plugins used the same approach: share it on GitHub and inform the user to clone the repository to the correct Domoticz folder. And when it comes to updating, it is just a pull in that folder and job done.
There is nothing in the Domoticz plugin structure that allows you to run something once the plugin gets installed or updated. My plugin has a dependency on a library that needs to be available, otherwise the plugin will not work. For now, I documented the most straight forward approach, but since I am new to Python, it may not be the best option. I will wait for people to respond to my work and see if somebody comes up with some nice advice.
Conclusion
Using Python was no problem at all; there’s plenty of documentation and examples out there.
Of course, I made lots of mistakes.
The one that came back most frequently was forgetting to type a : after function names and conditional statements.
It took a lot of time to find all the device specific information.
Although there is documentation, this is a real steep learning curve.
I have not yet figured out how to get the temperature device going correctly.
And I do not understand the difference between nValue and sValue.
I feel that there is a lot of undocumented knowledge that could be useful for developers.
So, now I have this working plugin. It is publicly available, and I have added the minimum set of documentation to it. But how do I let people know about its existence? I posted a message announcing the plugin in the Domoticz forums; let’s see what the impact of that is.
All in all, I am happy with the result and I enjoyed the process.
Want to respond to this post?
Look me up on GitHub,
 Facebook or
 LinkedIn.
Tags
- 3D 9
- Air Safari 19
- Australia 67
- BlackBerry 1
- Blue Sky Flying Adventures 33
- By Boat 4
- By Bus 2
- Dev Containers 3
- Domoticz 2
- Driving 31
- Facebook 1
- Flying 44
- Gallery 2 7
- Google Maps 4
- Hugo 1
- Jekyll 4
- Linux 3
- NextGEN Gallery 5
- Owning a plane 8
- Podman 3
- Red Centre Tour 19
- Singapore 3
- Tasmania 10
- USA 33
- WSL 2 4
- Walking 42
- WordPress 17